

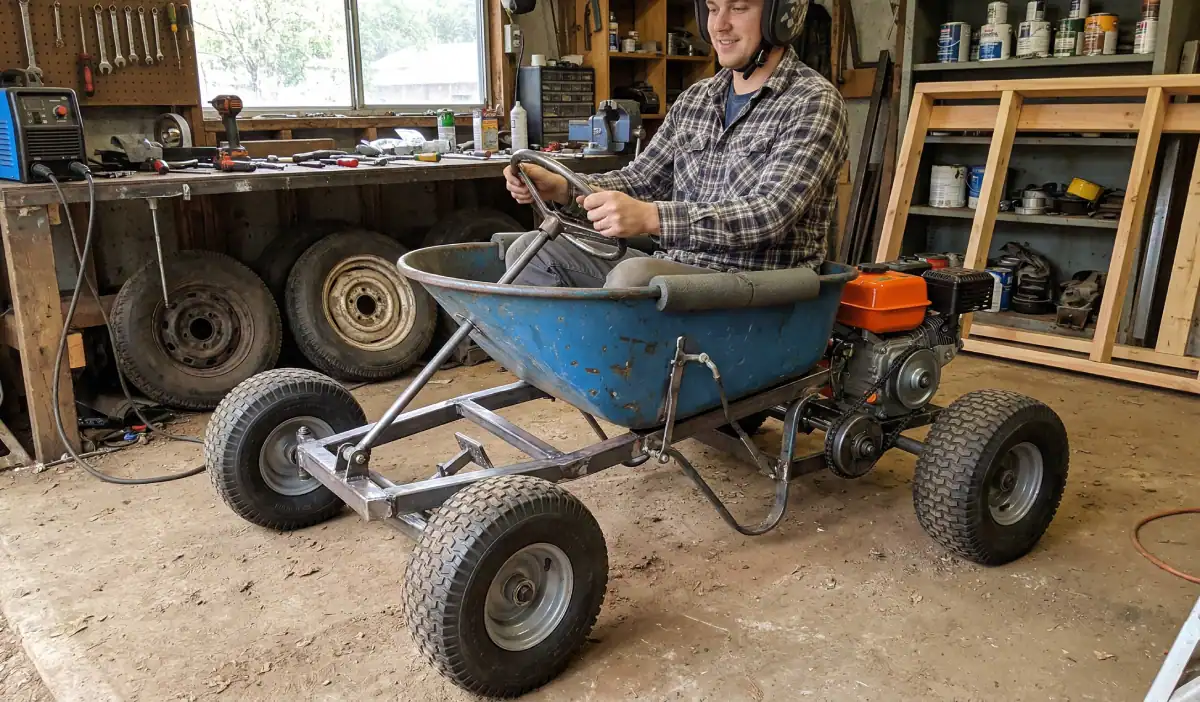
If you are looking for a weekend DIY project that combines upcycling, mechanics, and pure adrenaline, you have just found it. The wheelbarrow go cart is a legendary backyard build that transforms a common garden tool into a thrilling ride. Whether you want to build a simple gravity-powered hill bomber or a fully motorized backyard beast, turning a rusty old wheelbarrow into a functional go-kart is a project you won’t forget.
In this informational guide, we will break down exactly what makes these unique machines work, the materials you need, the basic steps to build one, and how to keep it safe.
What is a Wheelbarrow Go Cart?
A wheelbarrow go cart is exactly what it sounds like: a homemade go-kart that utilizes the metal or heavy-duty plastic tub of a wheelbarrow as the primary seating area and, occasionally, part of the structural chassis.
Instead of buying an expensive fiberglass racing seat, DIYers detach the tub from the wheelbarrow handles and mount it directly onto a custom-built frame (usually made of wood or welded steel). Because the tub naturally slopes and has high sides, it actually creates a surprisingly snug and secure “bucket seat” for the driver.
Why Build One?
Before you start tearing apart your landscaping equipment, you might be wondering why you should choose this specific design over a traditional wooden kart.
- Cost-Effective: Upcycling an old, broken wheelbarrow saves you money on seating and body materials.
- The “Rat Rod” Aesthetic: There is something undeniably cool and gritty about a motorized machine that looks like it was built from shed scraps.
- Accessible Engineering: It is an incredible starter project for parents and kids, or amateur mechanics looking to practice their framing and steering geometry skills.
Essential Materials and Tools
While every build is unique based on what you have lying around the garage, a standard build requires a few core components.
The Parts:
- One solid wheelbarrow tub (metal is preferred for durability, but thick poly-plastic works for lighter riders).
- Frame material: 2×4 and 2×6 treated lumber (for a gravity kart) OR square steel tubing (if you plan to weld a motorized kart).
- Four pneumatic tires (lawnmower or dolly wheels work great).
- Steel axles (threaded rods or solid steel, depending on your bearing setup).
- Steering wheel and steering column (metal piping or old bicycle parts).
- Braking mechanism (a simple scrub brake for wooden karts, or a disc brake kit for motorized ones).
- Optional: A small horizontal shaft engine (like a 212cc Predator engine) and a centrifugal clutch/chain system.
The Tools:
- Power drill and heavy-duty bits
- Circular saw or angle grinder
- Wrenches and socket set
- Measuring tape
- Optional but recommended: A MIG welder (for steel frames)
Step-by-Step Anatomy of the Build
Because of the vast amount of tutorial videos and short clips available online showing different variations, there is no single “right” way to build your kart. However, every successful wheelbarrow go cart follows this general progression.
1. Prepping the Tub
First, remove the tub from the wooden handles and the front wheel assembly. Clean it out thoroughly. You will need to drill holes in the bottom of the tub later to bolt it securely to your new frame. To make the ride comfortable, consider adding foam padding or an old boat cushion to the bottom of the tub.
2. Constructing the Frame
Your frame needs to be slightly wider and longer than the wheelbarrow tub to ensure stability and prevent rolling.
- For Gravity Karts: A classic wooden “H” frame or ladder frame is usually sufficient.
- For Motorized Karts: You will absolutely need a welded steel frame to handle the torque and vibrations of the engine. Leave enough room at the rear of the frame (behind the wheelbarrow seat) to mount your engine plate.
3. Setting Up the Axles and Steering
The rear axle is typically fixed to the frame. The front axle requires a steering mechanism. The most common and accessible DIY steering method is the Ackermann steering geometry using spindle brackets, or a simpler center-pivot front axle steered by a rope or a fixed steering column.
4. Mounting the Wheelbarrow
Once your rolling chassis is complete, place the wheelbarrow tub onto the center of the frame. Test the seating position. Ensure you can comfortably reach the steering wheel and where the pedals (or footrests) will go. Mark your drill spots, drill through the tub and the frame, and secure it using heavy-duty carriage bolts and washers.
5. Adding Power (Optional)
If you are upgrading from a gravity-fed hill bomber to a motorized wheelbarrow go cart, you will mount your engine to the rear platform. You will need to align the engine’s clutch sprocket with a sprocket mounted on your rear axle (live axle setup) and connect them with a durable chain. Add a throttle cable running from the engine to a pedal at the front of the kart.
6. Installing the Brakes
Do not skip this step. Even a gravity kart needs stopping power. A basic “scrub brake” is a lever that pushes a piece of wood or metal directly against the rear tire tread to slow you down. For a motorized version, a mechanical band brake or a hydraulic disc brake on the rear axle is highly recommended for safety.
Crucial Safety Guidelines
Riding in a garden tool at 20 miles per hour is inherently risky. Keep these safety tips in mind:
- Always wear a helmet. The edges of a wheelbarrow are hard metal.
- Pad the edges. Slit a pool noodle down the middle and wrap it around the top lip of the wheelbarrow tub to protect your ribs and arms from the sharp metal edge.
- Check your center of gravity. Wheelbarrows are deep. Mounting it too high on the frame makes the kart top-heavy and prone to flipping. Mount the seat as low to the ground as your frame allows.
- Test the brakes before the engine. Always test your stopping mechanism on a small incline before firing up a motor or taking it to a massive hill.
People Also Ask (FAQ)
Can I put a lawnmower engine on a wheelbarrow go cart? Yes. Vertical shaft engines from push mowers are harder to adapt, but it is possible with a right-angle gearbox. However, horizontal shaft engines (like those found on tillers, snowblowers, or bought at hardware stores) are much easier to mount and chain to a rear axle.
Is a metal or plastic wheelbarrow better? A metal tub is much safer and structurally sound, especially for adults or motorized karts. Plastic tubs can crack under the stress of rough terrain or the vibrations of an engine, though they can be suitable for lightweight, low-speed kids’ gravity karts.
How fast can a motorized wheelbarrow kart go? Depending on the gear ratio, the size of the tires, and the engine (commonly a 212cc), a homemade motorized kart can easily reach speeds of 20 to 35 mph. At these speeds, a welded steel frame and proper disc brakes are mandatory.
Do I need to weld to build one? No. If you are building a gravity-powered kart (designed strictly for rolling down hills), a sturdy frame made of 2×4 lumber held together with heavy-duty lag screws and bolts is completely sufficient. Welding is only strictly necessary if you are adding an engine.


